AirPinpoint Essentials
Everything you need to know to track your equipment with AirPinpoint
AirPinpoint turns AirTags into a fleet management system. Track equipment, set up geofences, and automate check-in/out workflows.
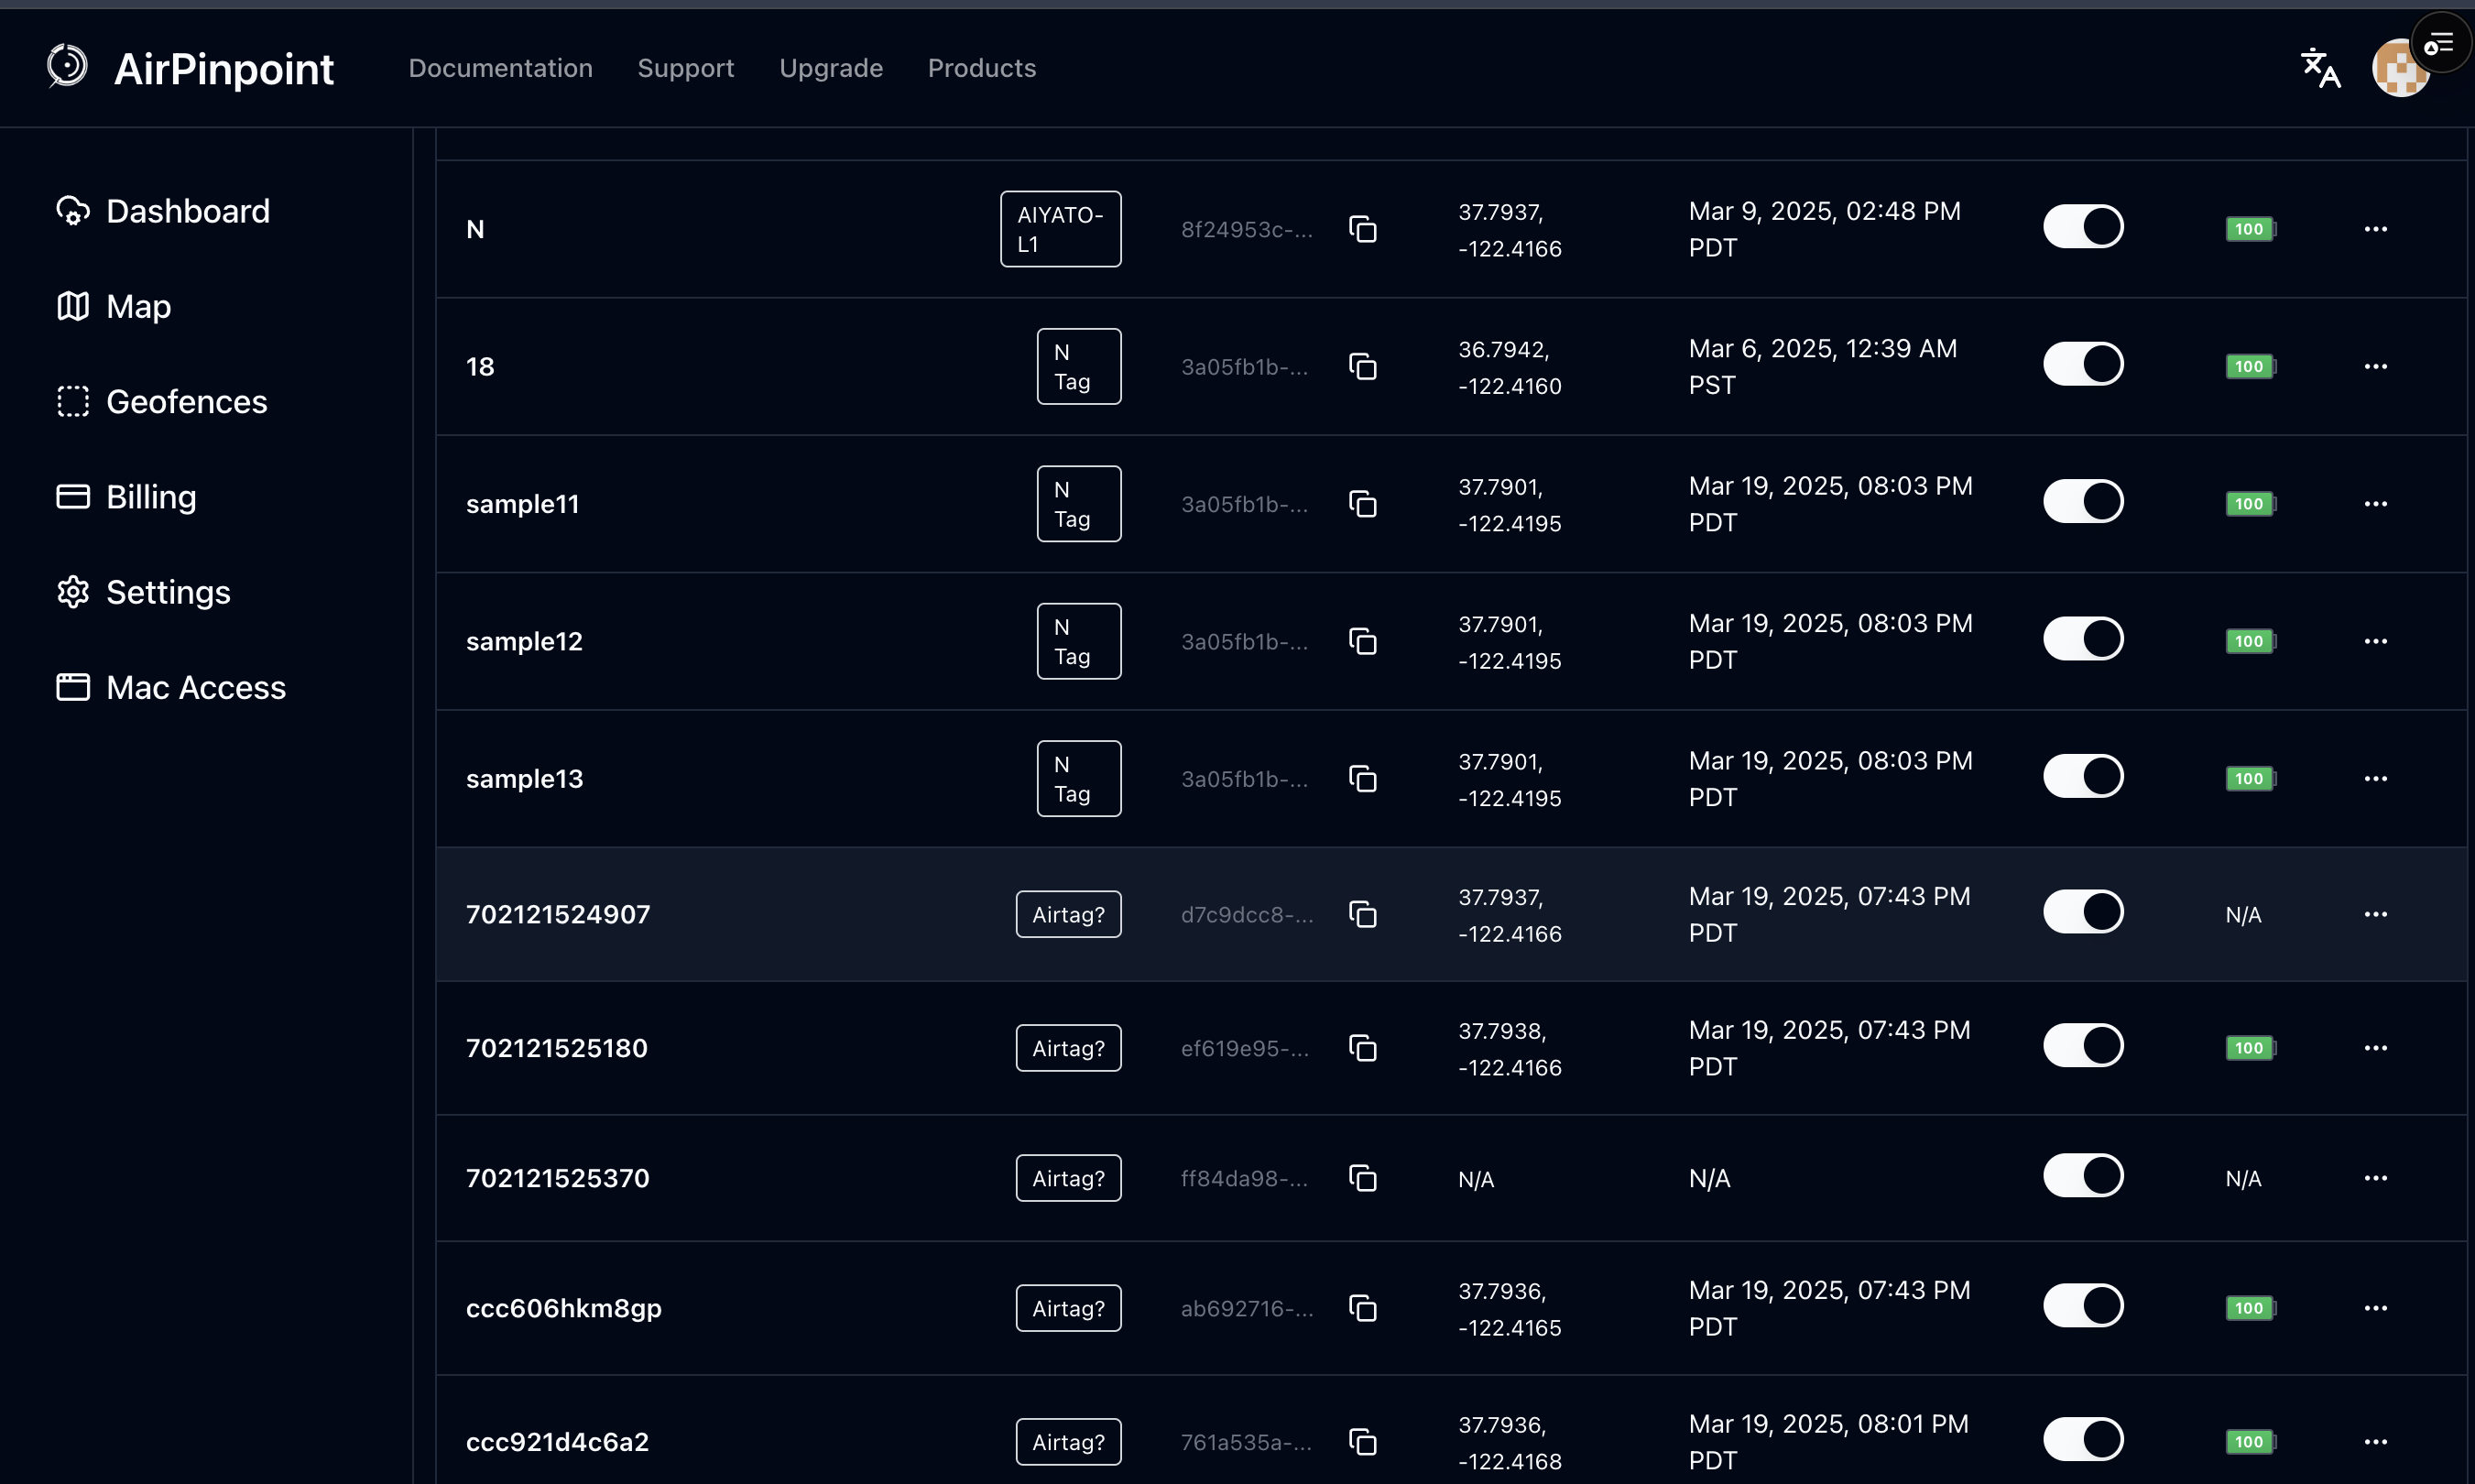
Dashboard overview
The main dashboard shows all your tracked equipment at a glance:
- Map view — Real-time locations of all devices
- Inventory list — Status, last seen time, and battery levels
- Quick stats — Available vs. checked-out counts
Managing inventory
For each tracked item you can:
- Create share links — Let others view location without an account
- Edit details — Update name, type, or notes
- Reassign AirTag — Swap to a different tracker
- View history — See location and check-in/out logs
Geofencing
Geofences are virtual boundaries that trigger actions when devices enter or exit.
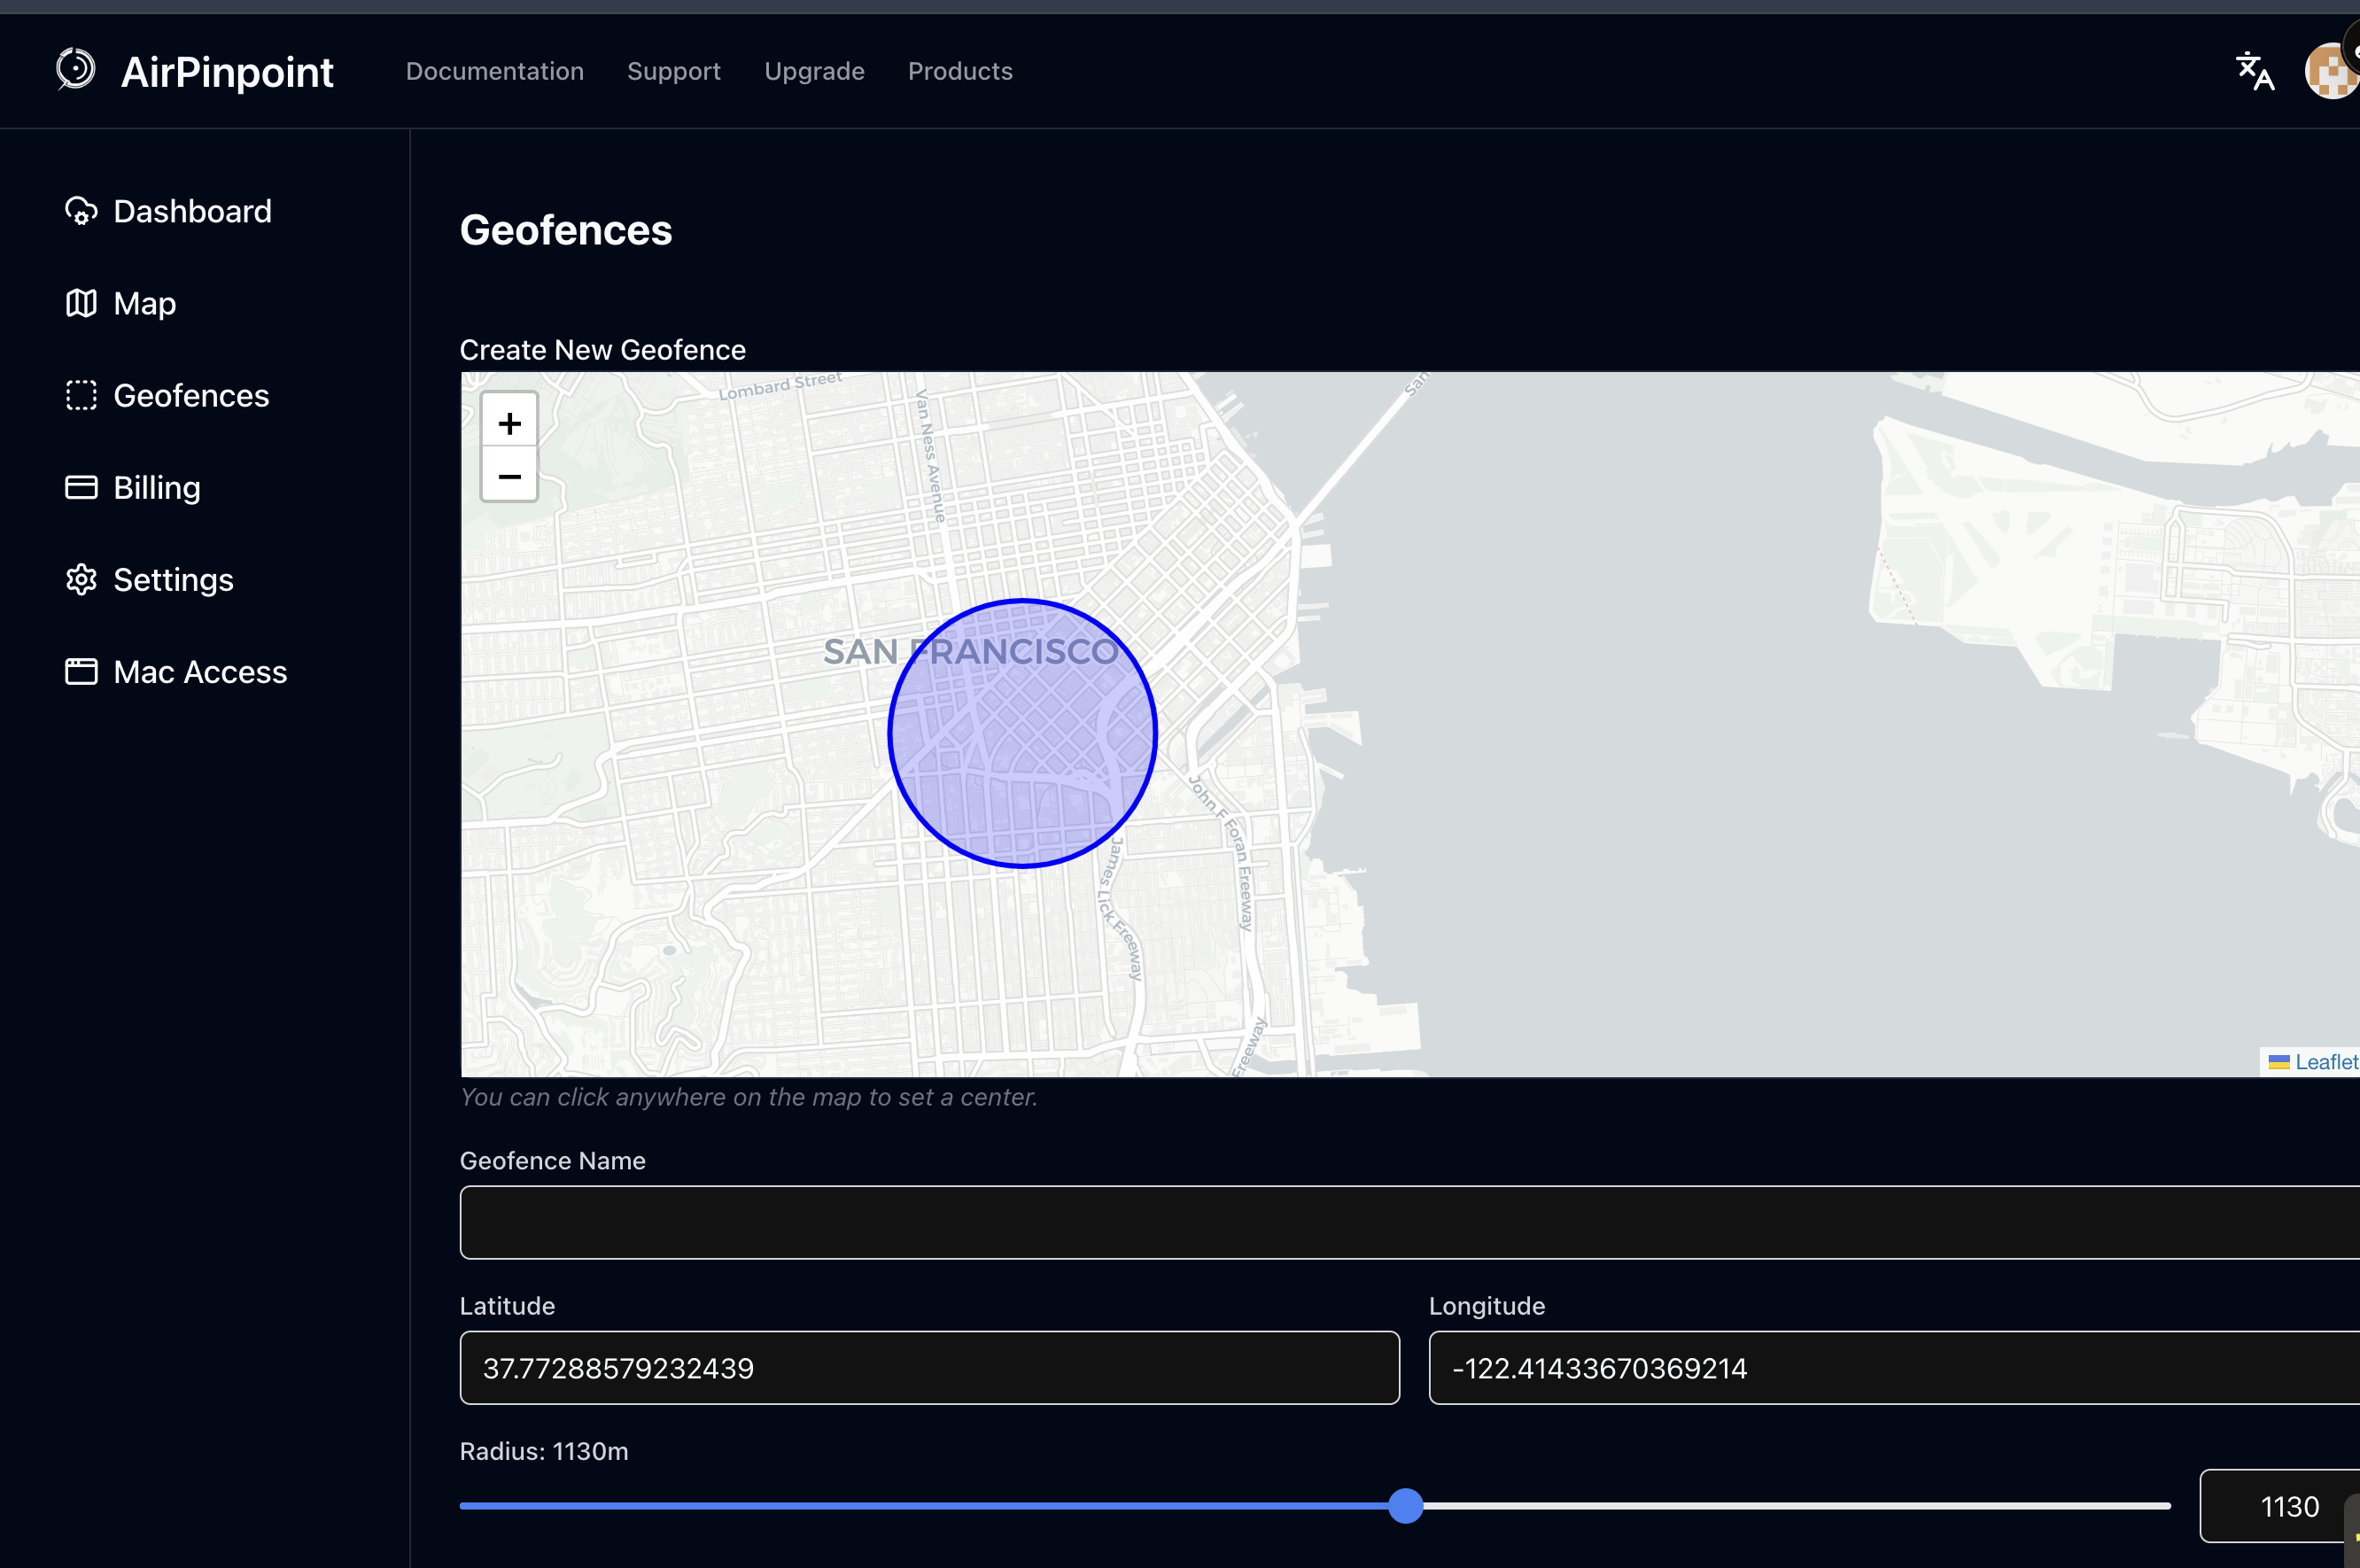
Creating a geofence
- Navigate to Geofences in the sidebar
- Click Create Geofence
- Click the map to set the center point (or enter coordinates)
- Configure:
- Name — A descriptive label
- Radius — Size in meters
- Devices — Which AirTags to monitor
- Notifications — Email alerts on entry/exit
- Click Create
Tip
Use larger radii (100m+) for outdoor areas to account for GPS accuracy.
Automatic check-in/out
Automate status tracking based on geofence location.
How it works
| Status | Trigger |
|---|---|
| Available | Device enters any assigned check-in geofence |
| Delivered | Device enters its delivery geofence |
| Checked Out | Manually assigned to a person/department |
Note
Manual check-out always takes priority over automatic status changes.
Setup
- Edit an inventory item
- Enable Auto Check-In/Out
- Select which geofences should trigger status changes
Bulk editing
Update multiple items at once:
- Select items using checkboxes in the inventory list
- Click Bulk Edit
- Assign geofences to all selected items
- Choose to replace or add to existing assignments
Beacon status types
AirPinpoint tracks four status levels:
| Status | Priority | Description |
|---|---|---|
| Checked Out | Highest | Manually assigned to someone |
| Delivered | High | Inside delivery geofence |
| Available | Medium | Inside check-in geofence |
| Unknown | Low | Outside all geofences |
Notifications
Get alerted when:
- Equipment enters/exits a geofence
- Equipment is checked in/out
- Battery runs low
Configure email notifications per-geofence. SMS notifications available on Business plans and higher.
Billing
Plans
| Plan | Price | Features |
|---|---|---|
| Business | $11.99/tag/mo | 1-min refresh, location history, fleet view, geofencing, SMS/email alerts, analytics |
| Enterprise | $14.99/tag/mo | All Business features plus webhooks, multi-user RBAC, reports, CSV export |
Purchasing AirTags
Buy AirTags directly from your Billing page. We strongly recommend purchasing from us for the smoothest experience - our tags come pre-configured and ready to use. You can bring your own AirTags, but this requires a Mac for setup and ongoing iCloud account management.