Signing into iCloud
Don't have a Mac? Learn how to use AirPinpoint Mac Access to sign into iCloud for your AirTag API setup.
macOS Setup Assistant Guide for AirTag API Setup
About Our Infrastructure
At AirPinpoint, we are committed to providing a reliable and compliant service. To ensure this:
- We run all our services on genuine Apple hardware. This approach allows us to comply with Apple's Terms of Service.
- Our use of official Apple devices and software maintains the complaince of our API.
- Accessing the Find My network is subject to Apple's terms of service. We reccomend you use a dedicated Apple ID for your devices.
Using AirPinpoint Mac Access
- This guide is for comapnies that do not own Macs.
- Email support@airpinpoint.com and we will enable Mac Access for your account.
- We strongly recommend using a dedicated iCloud account (instead of a personal one) for managing your AirTags.
Important: The Mac is only needed for this one-time setup step. Once configured, your devices will continue tracking through our infrastructure without requiring any Mac or iPhone to stay powered on.
Accessing the Mac Setup Assistant
-
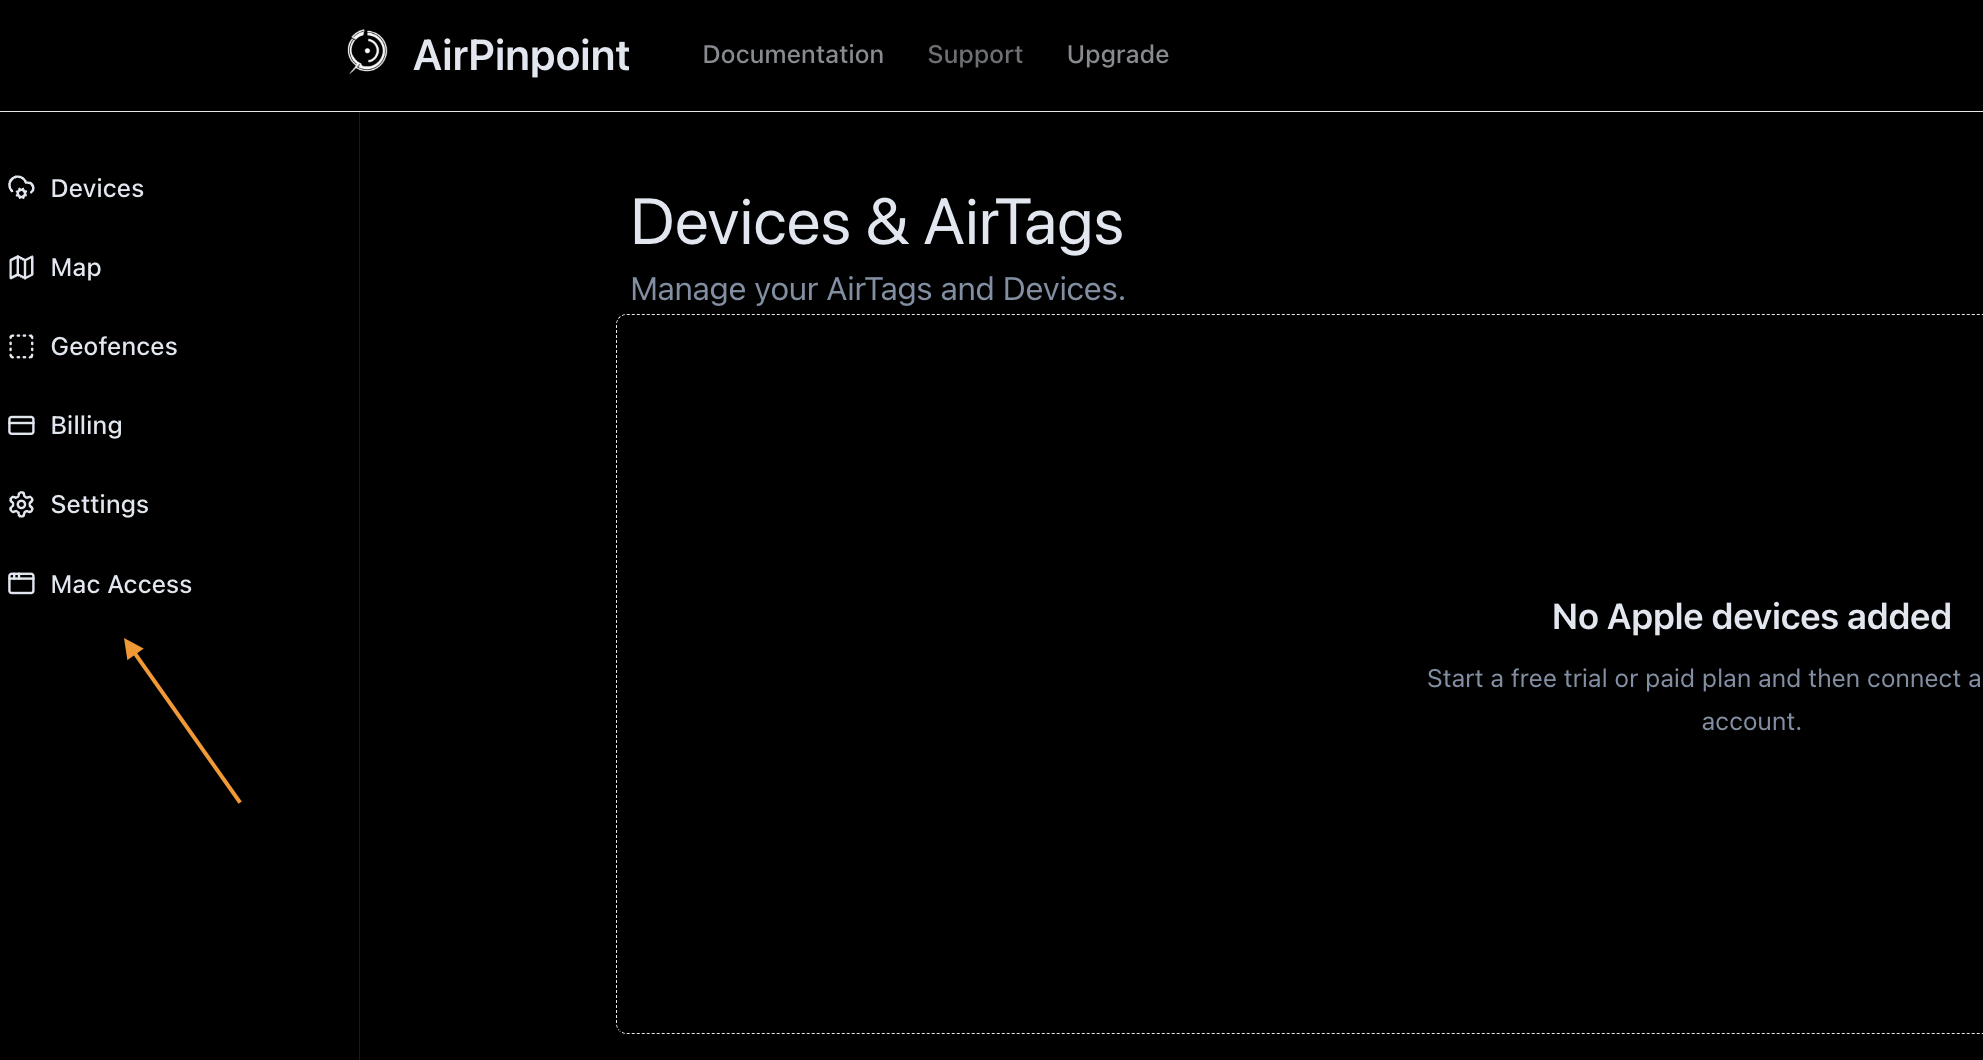
From your AirPinpoint dashboard, locate the "Mac Access" button:

-
Click this button to launch a Mac Instance. This will open a window with a macOS instance.
-
The instance may take 1-2 minutes to fully provision. Please be patient during this time.
-
Once connected, you'll see a fresh macOS setup screen where you can begin the setup and iCloud sign-in process.
Note: Each session lasts 10 minutes. This is typically more than enough time to complete the setup process. If you need more time, you can always start a new session.
Navigating the Setup Assistant
When setting up a new user account on macOS for AirTag API development, you'll encounter the Setup Assistant. This guide focuses on the crucial iCloud sign-in step and how to quickly navigate through other steps.
For most steps in the Setup Assistant, you can click "Set Up Later" or equivalent options to proceed quickly. The only step we'll focus on is the iCloud sign-in.

Accessibility and other initial steps: Click "Not Now" or "Set Up Later" (not relevant)
 Data & Privacy: Click "Continue"
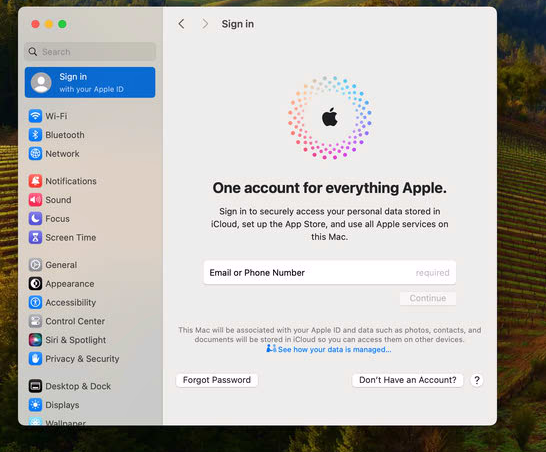
Sign In with Your Apple ID


This is the most crucial step for our AirTag API setup:
- We strongly recommend using a dedicated dummy iCloud account for your development devices. Create a new Apple ID if you don't have one for this purpose.
- Enter your Apple ID and password.
- You may be asked to complete a 2FA challenge. If so, enter the code from your iOS device.
- Tip: Apple 2FA may hang on the "Verifying" step. If this happens, click "Didn't get a code?" and you should see a code in your iOS notifications.
 Tip: Apple 2FA may hang on the "Verifying" step. If this happens, click "Didn't get a code?" to trigger a new notification, that goes to SMS instead
 - You may be asked to provide a password previously used on the device. If this happens, contact us at support@airpinpoint.com and we will help you out.
- Agree to the terms and conditions.
Important: Using a separate account helps keep your personal and development environments isolated, which is crucial for testing and development.
Skipping Through Other Steps
You'll need to get all the way through until you are inside a MacOS instance. For the remaining steps, continue to choose "Set Up Later" or "Skip" options. These do not matter for our setup:
 Screen Time: Choose "Set Up Later"
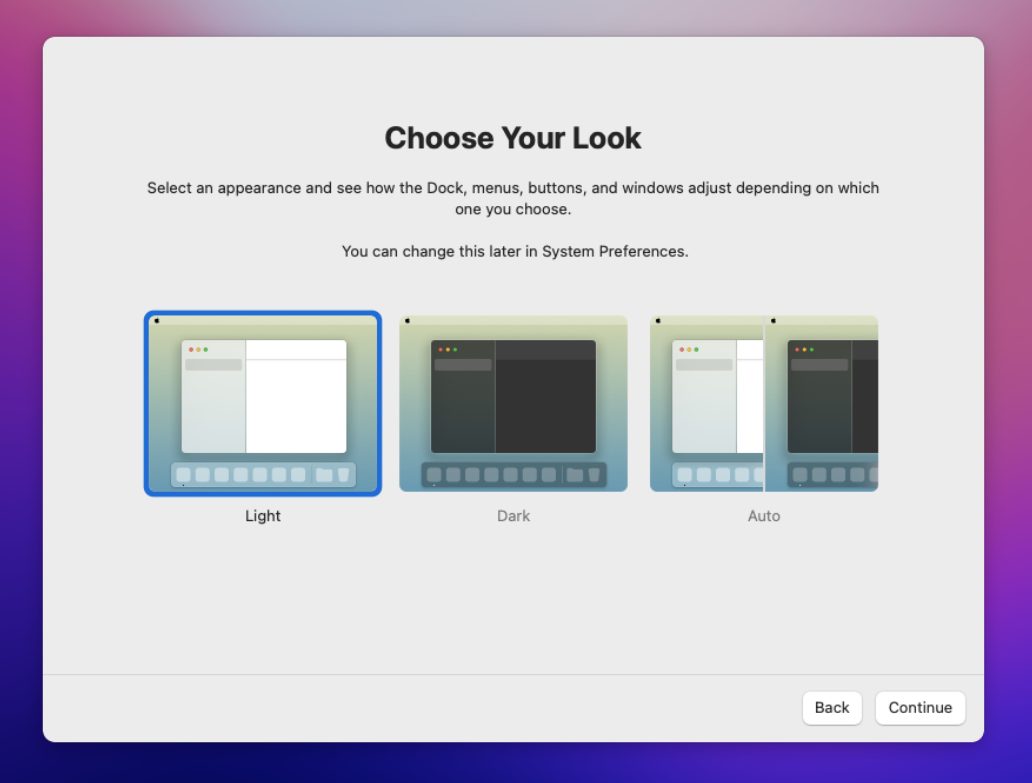
 Choose Your Look: Select any option
Once you get to the signed in MacOS page, you are done! Close the window and return to the AirPinpoint dashboard. After a few seconds, you should see your devices connected to your account.
Troubleshooting
Stuck on Verifying?
- Tip: Apple 2FA may hang on the "Verifying" step. If this happens, click "Didn't get a code?" to trigger a new notification, that goes to SMS instead.

Not seeing your devices?
After successfully logging into the macOS instance, you may need to enable "Passwords and Keychain" in the iCloud settings:
- Click on the Apple menu in the top-left corner of the screen.
- Select "System Preferences" (or "System Settings" in newer versions).
- Click on your Apple ID at the top of the preferences window.
- In the sidebar, click on "iCloud".
- Scroll down and ensure that "Passwords and Keychain" is checked.
Enabling this option ensures that your AirTag data can be properly synced and accessed by our API.
When asked for a password
- When asked for the current accounts passwords, you can see the instance password at the top of the view box.
Need to access your MacOS instance again?
Contact us at support@airpinpoint.com and we will help you out!
Next Steps
After completing the Setup Assistant, you'll be ready to use AirPinpoint and track your airtags and apple devices with our api.